
Starting With Reference Material
The first thing you’ll do — before touching any 3D software — is gather solid reference images. You’re looking for front, side, and three-quarter views of your character. High-quality photo references are worth their weight in gold. If you’re modeling a human character, find reference sheets from real people or professional concept art. Don’t just grab random images from the internet and hope they match.
Import these references into a dedicated reference board. Many artists use Photoshop or free tools like PureRef to organize their images. You’ll want them visible in your 3D viewport while modeling — most 3D software lets you place reference images as planes or background images. This keeps you grounded in accuracy as you work through blocking and refinement phases.
Analyzing Proportions
Before you start modeling, spend time measuring your references. Head-to-body ratio, limb lengths, muscle mass distribution — these details matter. If your character is 7.5 heads tall (standard for stylized humans), mark that on your reference. Note where the elbow sits relative to the ribcage. Check if the hands reach mid-thigh or lower. These measurements become your foundation for blocking.
This phase takes patience. You’re essentially doing anatomy homework. But getting proportions right now saves you from rebuilding geometry later. And honestly, that’s time you don’t want to spend redoing fundamental shapes.
Blocking Out Basic Forms
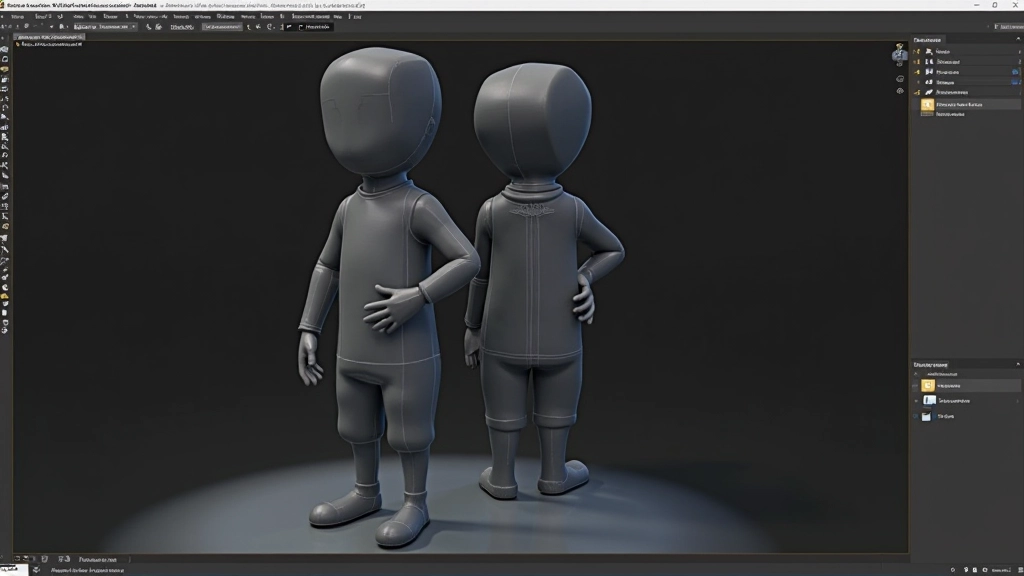
Now you move into your 3D software. You’re going to build your character using simple geometric shapes. This isn’t about detail — it’s about getting the silhouette and proportions locked down. Most artists start with primitives: cylinders for limbs, spheres for joints, cubes for the torso. Don’t spend hours making things perfect at this stage. Speed matters more than precision here.
This blocking phase typically takes 2-4 hours depending on complexity. You’re establishing the skeleton of your model. Once you’ve got the basic forms positioned correctly, you’ll sculpt over these shapes, so the geometry underneath doesn’t need to be perfect. What matters is that your proportions match your reference and your silhouette reads clearly from every angle.
Getting Proportions Into 3D
As you build your block-out, constantly rotate your model and compare it to your reference images. Flip between front and side views every few minutes. If something looks off, fix it now while you’re still working with simple shapes. The time you invest here prevents major rework later.
Many artists use a technique called “caging” — building a very simple, low-poly base mesh that defines the overall form. You’ll eventually sculpt on top of this or replace it with a more detailed mesh, but this cage keeps you honest about proportions.
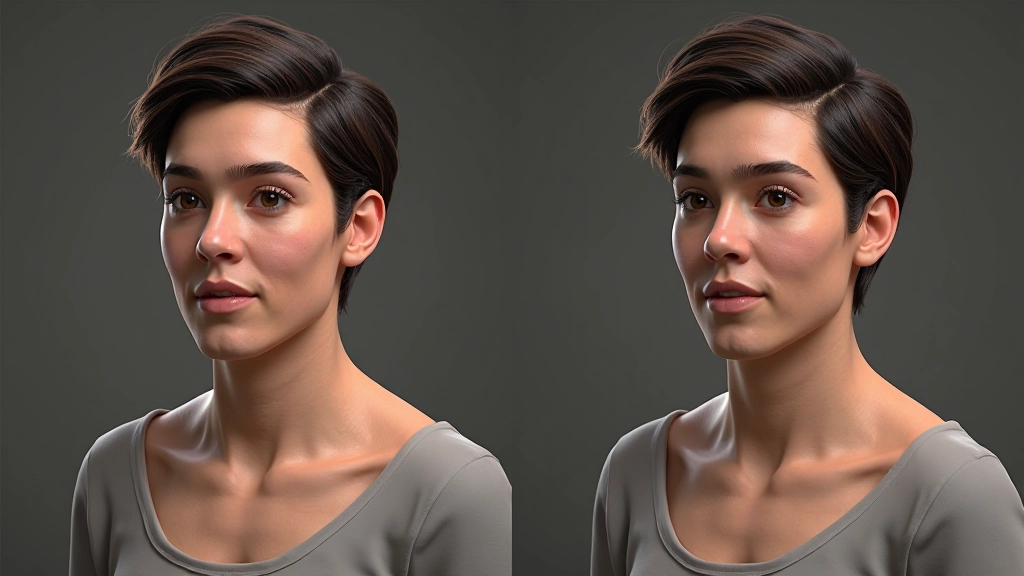
High-Poly Sculpting and Refinement
Once your block-out feels right, you’re ready to sculpt. This is where the character comes alive. You’ll add muscle definition, facial features, clothing folds, and surface details. Most artists use ZBrush or Blender’s sculpting tools for this phase. You’re working with millions of polygons now — don’t worry about performance. This is a separate high-poly version that you’ll optimize later.
Sculpting is iterative. You’ll spend time pushing and pulling geometry, adding detail in some areas, smoothing it out in others. Reference is still your best friend here. Keep comparing your sculpt to your original concept art. Notice how light and shadow fall on the face, how muscles bunch under the skin, how fabric drapes. These details are what make a character feel real.
Pro tip: Sculpting takes 8-20 hours depending on your character’s complexity. Don’t rush this phase. A well-sculpted high-poly model makes everything that follows — retopology, UV mapping, texturing — significantly easier. Plus, you’ll have a detailed master model to reference while working on lower-poly versions.
Retopology: Creating Game-Ready Geometry
Your sculpt looks beautiful but it’s got millions of polygons. You can’t use that in a real-time engine. This is where retopology comes in. You’re going to build a clean, optimized mesh that follows the surface of your high-poly sculpt. Think of it as wrapping a low-poly net around your detailed sculpture.
For a character game asset, you’re typically targeting 15,000-40,000 triangles depending on where the character appears in your game. A main protagonist might be 35,000 triangles. An NPC? Maybe 15,000. In Unreal Engine cinematics, you can go higher — 60,000-100,000 triangles if the character gets close-up screen time. The goal is visual quality within your polygon budget.
Building Clean Topology
Good topology follows the flow of the underlying anatomy. Your edge loops should follow muscle groups and facial structure. Why? Because when you rig and animate this character, good topology deforms naturally. Bad topology creates weird pinching and stretching when the character moves.
Most artists use tools like Topogun or Blender’s built-in retopo features. You’re essentially drawing quads (four-sided polygons) over your high-poly surface. It’s methodical work — roughly 6-12 hours depending on character complexity. There’s no shortcut. You’re laying the foundation for animation and deformation.
UV Mapping and Texture Preparation
Before texturing, you need to unwrap your model. UV mapping is the process of flattening your 3D geometry onto a 2D texture space. Imagine peeling an orange — you’re creating seams and laying out the peel flat. Your texture artist (or you, if you’re doing the whole pipeline) will paint on this 2D layout.
Good UV layout minimizes seams in visible areas, packs efficiently into your texture space, and avoids stretching. You’re typically working with a 4K texture (4096 4096 pixels) or sometimes two 2K textures for a game character. Every pixel counts. Wasted space is wasted texture resolution. Efficient UVs let you put more detail where it matters — the face, hands, and anywhere the camera gets close.
Testing Your UVs
After unwrapping, check for stretching. Apply a checker texture to your model. If the squares distort or stretch, your UVs need adjustment. Aim for uniform pixel density across your character — a pixel on the hand should be roughly the same size as a pixel on the torso.
This phase takes 4-8 hours. It’s detail-oriented work but crucial. Bad UVs show up immediately when you texture — patterns will stretch, seams will be obvious, and your texture resolution will feel inconsistent.
Texturing for Realism and Performance
Now comes the payoff. Texturing is where your character goes from grey plastic to a living, breathing person. You’ll create color maps, normal maps (for surface detail), roughness maps, and metallic maps. Most game characters use PBR (physically-based rendering) textures, which means your maps represent real-world material properties.
Your color map is the base diffuse — the overall color and tone of the character. Your normal map encodes surface detail so you don’t need extra geometry. A good normal map can make a 40,000 polygon character look like it has millions of details. That’s the whole point of normal mapping in game development. You’re faking geometric detail using lighting tricks.
Texture Map Types
- Diffuse/Albedo: Base color without lighting information. What color is the surface?
- Normal Map: Encodes surface detail. Creates the illusion of bumps and wrinkles without extra polygons.
- Roughness Map: Controls how shiny or matte the surface is. Skin is less shiny than metal.
- Metallic Map: Defines which areas are metallic (armor, jewelry) versus non-metallic (fabric, skin).
- Ambient Occlusion: Subtle shadows in crevices. Adds depth to your character without being too obvious.
From Asset to Engine
Once your textures are done, you’re ready to import into Unreal Engine. You’ll export your model as FBX, set up material instances in the engine, and configure your skeletal mesh if the character needs animation. The process typically goes like this: Import mesh Apply materials Test in engine Iterate on materials based on how they look under actual game lighting.
The whole pipeline from concept to game-ready asset takes roughly 60-100 hours depending on character complexity and your experience level. A stylized character might be faster. A photorealistic character with extensive detail work takes longer. That’s why studios have whole teams — some artists specialize in sculpting, others handle retopo and UVs, others focus purely on texturing.
But here’s the thing: if you understand the whole pipeline, you’re infinitely more valuable. You can optimize your own workflow. You catch issues early instead of discovering problems in the engine. And you produce characters that actually look good under real-time lighting, not just in render previews.
Disclaimer
This guide provides general information about character modeling workflows and is intended for educational purposes. Specific software capabilities, polygon budgets, and optimization requirements vary depending on your target platform, project scope, and technical requirements. Always refer to your game engine’s documentation and consult with your technical team regarding performance budgets and asset specifications for your particular project. Software versions and features change over time — the techniques described here reflect common practices but may require adaptation based on your tools and pipeline.